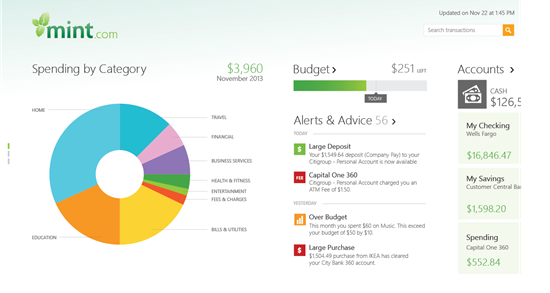
In Post 14, we explored the reasons why tracking your expenses is so important. This post will now guide you through setting up your Mint account to propel you forward on your journey to financial independence. This can actually be pretty fun. Let’s get started!
Set up an account
First, you need to set up an account. You should do that on the Mint.com website and not your phone. You will also need any usernames and passwords for any financial accounts you currently have. One thing I like about Mint is that they are not interested in knowing your name, address, or social security number. After you have set up your account, you should download the app to your smartphone, as that is how you will be using Mint the most.
Sync all your accounts
When you are setting up your account, Mint will prompt you to enter all of your financial account information. Once they have it, Mint will automatically pull all the transactions and put them in your Mint account. At this point in your life, you may only have one or two accounts like a checking account and a credit card. But as you get older, you will add many more accounts to your financial portfolio, and you can add them to Mint as you get them.
The best thing about Mint and similar apps is that it does all the work for you. By pulling all your financial transactions into one place, you don’t have to do any math or transfer any data. It’s just automatically there for you to review. Easy peasy, lemon squeezy!
Keep in mind: It takes a few days for transactions to appear in Mint, so the balance that Mint shows for your accounts is usually not current. Therefore, using Mint to look up your checking account balance is not a good idea. To see your checking account balance, use your bank’s app.
Cash transactions
The one thing Mint cannot keep track of is anything you buy in cash. Thankfully, cash purchases are pretty rare nowadays. Usually, we use our debit cards, credit cards, Apple Pay, Google Wallet, or another electronic payment method when making our purchases. These electronic payment methods work well with Mint, but cash transactions are not trackable by the app.
The answer: add transactions into your Mint account for each cash purchase you make so that your expense totals are as accurate as can be. You NEED to do this so your expense totals are genuinely representative of where your money is going.

“So, what if I make a purchase with cash?”
Here’s what I do. I have a note in my phone that is titled “Spending”. Whenever I spend cash, I open that note and quickly type what that purchase was, the date, and the amount. Then, once a month, I go to Mint and enter each of those cash transactions into my Mint account. I have a monthly reminder in my phone calendar to enter the cash transactions from my phone note. Hint – before you review the previous month’s numbers, make sure you’ve entered all the cash transactions for that month.
You will also need to do input any cash you receive into your Mint account as well. For example, if you receive $50 cash from your parents for your birthday, you should go to Mint and input that $50 cash as income. If you get paid in cash (maybe you mow a neighbor’s lawn for $20 cash), you will also need to add that transaction into your Mint account as cash income. Just use the same phone note mentioned above to keep track of cash income until you enter the income into the app.
Even better, you can categorize each cash income transaction as something like “lawn care income”. Remember that the more detailed you are, the more informative and useful the reports, charts, and analyses will be for you.
ALL of the cash that you receive must be recorded as income so that your monthly statements are accurate.

Features
There are lots of handy tools that make it easy to keep track of everything. For instance, if you make a purchase from Amazon that includes some clothing and some school supplies, you can split that one transaction into separate parts and assign each of them to their appropriate expense category.
You can also input the approximate value of your personal property, such as your car, music equipment, or a bike. If you own a car, Mint will grab the value of it off of the internet from trustworthy sources such as Kelley Blue Book. (If you have a car loan, don’t forget to enter that information under “Loans”.) You can also input the estimated value of other personal property. Be careful not to overestimate the value of this stuff. A good rule of thumb is that the maximum amount it would be worth is half of what you (or someone else) paid for it when it was brand new. Sad, but true. Generally, the older the item is, the less it is worth of that maximum “half-price” amount.
After you have entered everything, you will be able to see your net worth. It’s a little easier to find on the website version of Mint than the app version. There’s also a way to see your net worth history over months and years on the website, which is pretty cool to keep track of. If your net worth is currently a negative number, don’t judge yourself or get upset. You are young and have plenty of time to get it right.

Being able to see where your money goes
Once you have tracked your spending for a month or two, you can go in and look at what Mint calls your “Trends”. By clicking on this tab and choosing a time frame (such as “last month”) and a category (such as “entertainment”), you can instantly see how much you spent. Knowing how much you spent on entertainment last month (or some other category) will change you not because you’ve set a budget for that category and you want to stay under that amount, but because you will see the total for each category and know you can do better next month.
That’s why I stress that you need to track your spending rather than have a budget. If you set a budget amount for entertainment at $200 per month, you might be tempted to spend until you hit that $200 mark. But if you don’t have a budget amount and you see that you spent $200 last month, you will likely say to yourself, “How did I spend that much? I can beat (spend less than) that this month!”
Categories
Mint has main categories and subcategories already set up in the app. However, you will likely need to add subcategories as you track your expenses over the first few months. The subcategories you add will reflect the uniqueness of your life. You will continually be adding or revising subcategories as you go through your first few months.

Remember, you are also tracking all of the money that flows INTO your life as well. Mint has a main category called “Income”, and it has preassigned subcategories. You should add a subcategory for each way that money comes to you. These could include: Allowance, Lawn mowing, Babysitting, Gifts, Movie theater paycheck, etc.
You need to observe your spending amounts for each category over each month and slowly adjust your patterns of spending. As a young person, you are likely not spending thousands of dollars every month as an adult may do. But you are likely still spending some money on games, shows, gas, eating out, clothing, electronics, etc. As you track your spending for these categories, you may (or may not) be surprised at how much money you are spending on each. If it’s a number that is a lot higher than you might have guessed (or think that number should be), then let the adjusting to a frugal freak level begin. Every dollar you spend should bring you great value in return. If it didn’t, then it would have been better to save that dollar.
Conclusion
So create your account (Mint or other preferred option), connect your financial accounts, and start exploring the options like a freak. Make this your go-to place to see your overall money picture. I check my Mint app at least once a day to see what’s going on. It can also tell you about upcoming bills you need to pay or large expense transactions that you should double-check.

Leave a Reply